Description
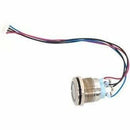
The 2N IP Safety Intercom Replacement Button in blue is a purpose-built accessory designed to restore peak performance to your 2N IP Safety Intercom system while elevating the overall safety and usability of your access control environment. Engineered for reliability, this replacement button delivers tactile feedback, quick recognition, and a robust build that stands up to the demands of busy facilities. Whether you’re refurbishing an aging intercom panel, stocking service parts for a multi-site deployment, or upgrading a security kiosk, this blue replacement button blends seamlessly with existing 2N IP installations and provides a consistent, intuitive user experience. It’s more than a spare part—it’s a crucial element of dependable communication and rapid response in environments where every second counts.
- High-visibility blue design for fast identification — The saturated blue color is engineered to stand out in crowded lobbies, hallways, and work zones, helping visitors, staff, and responders locate the intercom control quickly, even in low-light conditions or during high-traffic periods.
- Durable, vandal-resistant construction for demanding environments — Crafted from rugged materials that resist impacts, abrasion, and frequent cleaning, this replacement button is built to endure hospital corridors, manufacturing floors, universities, and transit hubs without compromising performance or appearance.
- Plug-and-play replacement for 2N IP Safety Intercom systems — Designed to integrate with existing 2N IP Safety Intercom installations, enabling faster swaps and reduced downtime during maintenance or upgrades, so your communication lines stay up when you need them most.
- Consistent operation across configurations — Engineered to maintain reliable push-button signaling across a range of 2N IP intercom configurations, ensuring that calls, alerts, and access requests are transmitted clearly to the control unit every time.
- Low-maintenance, long-term solution — With a focus on longevity and minimal upkeep, this replacement button minimizes maintenance cycles and lowers total cost of ownership for facilities managers responsible for large-scale deployments.
Technical Details of 2N IP Safety Intercom Replacement Button
- Product name: 2N IP Safety Intercom Replacement Button
- Color: Blue
- Material: High-impact ABS polymer with a durable, UV-stable finish
- Mounting: Compatible with standard 2N backbox mounting for quick installation
- Interface: IP-based intercom integration for seamless signalling
- Compatibility: Designed for the 2N IP Safety Intercom family and selected models within the series
- Environmental considerations: Suitable for indoor use in a broad range of facility environments; verify environmental requirements in official documentation for your exact site conditions
how to install 2N IP Safety Intercom Replacement Button
- Power down the intercom system and disconnect power to the backbox area to ensure safe handling during the replacement process.
- Remove the existing replacement button or faceplate from the backbox, taking note of how the wiring harness and terminals are connected for an accurate transfer to the new unit.
- Inspect the wiring and terminal connections for any signs of wear or corrosion. If needed, clean or replace connectors to ensure a solid, reliable electrical interface with the new button.
- Connect the wiring harness to the corresponding terminals on the 2N IP Safety Intercom Replacement Button, following the labeling or diagram that matches your system’s configuration.
- Mount the replacement button into the backbox using the standard mounting hardware. Align the button for proper actuator operation and secure it firmly to avoid loosening through regular use or environmental vibrations.
- Restore power to the intercom system and perform a functional test. Confirm that presses register as calls or alerts, and verify that any associated LED indicators or status signals (if applicable) respond as expected.
- Document the replacement in your maintenance records and perform periodic functional checks to ensure long-term reliability. If any anomalies arise during testing, consult the official 2N documentation or contact authorized support to confirm compatibility and installation steps.
Frequently asked questions
-
Q: Is this replacement button compatible with all 2N IP Safety Intercom models?
A: The 2N IP Safety Intercom Replacement Button is designed to work with the 2N IP Safety Intercom family and supported configurations within that series. For exact model compatibility, compare your intercom backbox configuration and wiring diagram with the standard 2N IP Safety Intercom installation guidelines. If you’re unsure, consult your system’s documentation or reach out to an authorized installer for verification.
-
Q: What is the color option for this replacement button?
A: This particular replacement button is finished in blue to provide high visibility and easy identification within your facility’s signage and safety workflows.
-
Q: Does this button come with mounting screws or hardware?
A: The replacement button is designed to fit standard 2N backbox mounting. Depending on your purchase bundle, it may include or require your own compatible mounting hardware. Always verify the contents of the package against your installation needs before proceeding.
-
Q: Can I use this button outdoors?
A: The button is intended for indoor use or sheltered outdoor environments, depending on your enclosure and mounting arrangement. For outdoor deployments, ensure the installation is protected by an appropriate enclosure that meets your site’s environmental requirements.
-
Q: What tools are needed to install the replacement button?
A: Basic hand tools for backbox access and securing screws are typically sufficient (e.g., screwdriver). Always follow the wiring diagram provided with your 2N IP Safety Intercom system and the replacement button to ensure proper electrical connections and safe installation.
-
Q: How can I verify the replacement button is functioning correctly after installation?
A: After installation, power the system and perform a test call or alert from the button, observe the control unit’s response, and check any status indicators or LED signals. If available, run a diagnostic check from the system interface to confirm signaling integrity and absence of fault indicators.
Customer reviews
Showing - Of Reviews


