Description
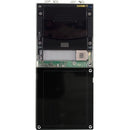
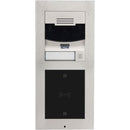
Experience a next‑level door entry solution with the 2N Main Unit with Camera. Built to be the cornerstone of a scalable security system, this modular intercom delivers crisp video, reliable audio, and seamless integration with future add‑ons. The design centers on a single primary unit per installation, with a dedicated second frame/box position reserved exclusively for expanding functionality as your security needs evolve. This model is also available in black, offering a sleek, professional look that complements any architectural style while preserving the same dependable performance. Ideal for commercial lobbies, gated communities, or high‑traffic entrances, the 2N Main Unit with Camera combines simplicity of installation with advanced access control features to simplify visitor management and enhance site security.
- Single primary unit per installation: In every setup, there must be just one main unit (with or without a camera). The system is designed to ensure clean, reliable operations by centralizing core control in one device, reducing maintenance complexity while delivering consistent performance across an entire site.
- Two frame/box positions for future expansion: The main unit installation requires two frame or box positions. The second position is intentionally left open to accommodate an additional module—such as a reader, keypad, or relay—without removing or replacing the core hardware. This modular approach lets you scale your access control as needs grow, preserving your original investment.
- Integrated camera for video intercom: When configured with a camera, the main unit enables real‑time video verification of visitors, while maintaining clear two‑way audio communication. Video intercom capability increases security by allowing staff or residents to visually confirm identities prior to granting entry, even from remote locations via connected devices.
- Durable, weather‑resistant design (black variant available): The 2N Main Unit with Camera is built to endure challenging environments. Its robust housing protects sensitive electronics from dust, moisture, and wear, making it suitable for outdoor or entry‑way installations. The black variant delivers a modern, professional aesthetic that blends with contemporary facades while preserving the unit’s durability and reliability.
- Seamless integration with 2N ecosystem: Designed to work with the broader family of 2N modules, the main unit can connect to additional components such as access readers, door relays, and control panels. This interoperability enables a cohesive, multifunctional entry system that supports customizable access rules, event logging, and remote management for enhanced security and convenience.
Technical Details of 2N Main Unit with Camera
Specifications in this description reflect typical configurations available from 2N and affiliated distributors. Exact technical data, including power, interfaces, and environmental ratings, are determined by SKU/UPC and may vary by market. For precise details, consult the official product catalog or your distributor’s listing.
- Product type: Main unit with optional camera integration
- Per installation unit count: 1 main unit per installation
- Expansion capability: Secondary frame/box position available for additional module installation
- Color options: Available in black variant for a sleek appearance
- Build and suitability: Durable housing designed for indoor and outdoor entry environments
How to install 2N Main Unit with Camera
Install the 2N Main Unit with Camera with attention to the two‑frame requirement and a clean, future‑proof mounting surface. Begin by planning the layout so that the main unit sits at an accessible height for visitors and operators, while the second frame position remains ready for a future module. Ensure you have the necessary mounting boxes, connectors, and power/communication supplies before starting. Follow these general steps to achieve a secure, reliable installation that minimizes maintenance and maximizes system reliability.
Step 1: Prepare the mounting area. Verify the wall surface can support the weight and is free of obstructions. Confirm the location’s proximity to network access and power supply if required by your configuration. Mark the two frame positions precisely to ensure alignment of the main unit and the second module space. Step and spacing accuracy matters for a clean, professional installation and optimal camera coverage if the unit includes video capabilities.
Step 2: Install the two frames/boxes. Secure the primary frame at the designated height and depth, followed by the second frame in the second position. Use compatible mounting hardware appropriate for your wall material to ensure a rigid, vibration‑free foundation for the main unit and any future module. Double‑check that both frames are plumb and level to avoid misalignment of panels, which can impact watertight seals and module alignment.
Step 3: Mount the main unit. Attach the main unit to the primary frame, ensuring any camera optics (if included) have an unobstructed field of view. Connect the required power and data cables according to the manufacturer’s wiring diagram, paying close attention to polarity and shielding requirements to minimize interference and maximize performance.
Step 4: Connect expansion options (if any). If you plan to install an additional module in the second frame position, prepare the module and connect it according to the provided wiring diagrams. This allows you to expand capabilities—such as adding a card reader or keypad—without reconfiguring the entire system.
Step 5: Configure network and access control. Once hardware is in place, power up the unit and perform initial configuration, ensuring network connectivity, device pairing, and any required security settings. Configure access control rules, door relays, and event logging to align with site policies. If a camera is part of the configuration, calibrate camera settings for optimal lighting and audio clarity, and test video streaming for real‑time visitor verification.
Step 6: Test the system end‑to‑end. Verify that visitors can initiate calls to the designated endpoints, that video and audio quality meet expectations, and that any connected relays or door mechanisms respond correctly. Test expansion module functionality in its dedicated frame position, confirming that the system recognizes and configures the module automatically or via manual setup as required by your software ecosystem.
Step 7: Finalize and secure. Seal any cable entry points to maintain weather resistance, install any protective covers, and perform a final security review to ensure there are no exposed conductors or loose components. Update documentation with the installation date, serial numbers, and module configurations for maintenance and future upgrades.
With these steps, you’ll achieve a robust, scalable entry system that remains easy to service and upgrade. The modular approach ensures you can add features over time without needing a full replacement, protecting your investment and adapting to evolving security requirements. The black variant offers a contemporary look that complements modern building designs while maintaining the same robust performance characteristics as the standard finish.
Frequently asked questions
Q: Can the main unit be installed without a camera?
A: Yes. The main unit can be installed with or without a camera, depending on your security needs and project requirements. When optional video verification is desired later, adding the camera integration in the primary unit or through the expansion frame is designed to be straightforward, preserving system continuity.
Q: How many frame positions are required, and what is the purpose of the second position?
A: Two frame/box positions are required for the main unit installation. The second position is reserved for an additional module, enabling features such as an extra reader, keypad, or relay. This layout supports future upgrades without replacing the core unit, simplifying maintenance and expansion.
Q: Is the device available in a black color?
A: Yes. The 2N Main Unit with Camera is available in black, offering a sleek, professional appearance that blends with a wide range of architectural styles while maintaining weather‑resistant durability.
Q: Is the housing suitable for outdoor use?
A: The unit is designed with a robust housing intended to withstand outdoor conditions. When installing outdoors, follow recommended sealing, mounting, and weatherproofing practices to preserve performance and longevity.
Q: How does this unit integrate with other 2N modules?
A: The main unit is designed to integrate seamlessly with the broader 2N ecosystem. This enables you to connect additional components such as access readers, door relays, and control panels, creating a cohesive, configurable access solution that can be tailored to specific site requirements and security policies.
Q: Where can I find exact technical specifications for a specific SKU?
A: Exact specifications depend on the SKU or UPC you purchase. For precise data, consult the official 2N product catalog or your distributor’s listing, which will provide the full technical sheet, wiring diagrams, environmental ratings, and compatibility notes for that specific configuration.
Customer reviews
Showing - Of Reviews


