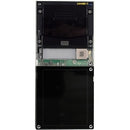
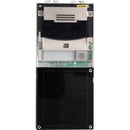
Description
Experience streamlined access control with the 2N Main Unit Without Camera, the central backbone of your door entry system. In every installation, there must be exactly one main unit (with or without a camera) positioned as the primary control hub. The design is focused on reliability and future-ready scalability, offering two frame/box positions for mounting, with the second position reserved for additional module installation. This variant is also available in black, delivering a sleek, discreet look that blends with modern architectural aesthetics. Built to withstand daily use in commercial environments, the 2N Main Unit Without Camera combines robust hardware with flexible configuration options that support a wide range of door entry scenarios. Whether you are upgrading an existing system or deploying a new installation from scratch, this main unit acts as the core processing unit, coordinating signals, access permissions, and integration with other modules in the 2N ecosystem.
- Flexibility at the core: The main unit is the single, central control point required in every installation, ensuring consistent operation whether you choose to equip it with a camera later or keep it camera-free for privacy and labeling requirements. This design supports seamless integration with other components in the 2N family, including enclosures, power supplies, and accessories, so you can tailor the system to your site without changing the core hardware. By consolidating the primary processing and interface functions in one robust unit, technicians gain a reliable foundation that simplifies configuration, maintenance, and future upgrades.
- Dual frame/box mounting positions: The installation design requires two frame/box positions, laying out a clear path for power, data wiring, and expansion while keeping the site organized and compliant with standard mounting practices. The primary position houses the main unit, while the secondary back box remains ready for a future module, such as a reader, relay, or sensor, ensuring you don’t need to disrupt existing work to add capabilities. This approach helps meet building codes, reduces field labor, and promotes clean, professional installations.
- Reserved expansion slot for future modules: The second frame position is intentionally left available to accommodate additional modules, such as access readers, relays, or other 2N accessories, enabling scalable growth without rework. With this forward-thinking architecture, you can plan for security upgrades, expanded functionality, or new integration points as your site’s requirements evolve, keeping downtime to a minimum and ensuring a smooth upgrade path.
- Discreet, modern black variant: In addition to standard finishes, the 2N Main Unit Without Camera is available in black, offering a contemporary look that complements a wide range of building exteriors and interior décor. The color option is designed to blend with door structures, wall finishes, and signage while maintaining high visibility for visitors and easy recognition for users. The black variant also helps reduce glare in bright environments and provides a professional, high-end appearance suitable for corporate, hospitality, and residential installations.
- Reliable, easy-to-install architecture: The main unit is engineered for straightforward installation and ongoing maintenance. It features robust construction, clear mounting guidelines, and compatibility with common frames and boxes used in professional installations. The design emphasizes fault tolerance, modular expandability, and long-term durability, so technicians can complete installations quickly and confidently, minimize service calls, and ensure stable performance across the life of the system.
Technical Details of 2N Main Unit Without Camera
- Product type: Main unit for access control (camera-free variant).
- Color options: Available in black in addition to standard color variants.
- Mounting: Requires two frame/box positions for installation.
- Expansion: Second frame position reserved for additional module installation.
- Notes: Specific dimensions, weight, and electrical specifications are not provided in the current product description; refer to official documentation or retailer specifications for precise figures.
How to install 2N Main Unit Without Camera
- Step 1: Begin by planning the installation layout, ensuring there are two compatible frame/box positions on the wall or mounting surface. Confirm the primary position will house the main unit (with or without a camera) and designate the secondary position for potential module expansion. Consider wiring routes, accessibility for maintenance, and local code requirements before starting.
- Step 2: Prepare the mounting frames or back boxes according to local building codes and the product’s mounting guidelines. Verify that the frames are securely anchored and properly aligned to accommodate the main unit's connectors and clearance requirements. Use the recommended fasteners and ensure there is adequate space for cable management and future module installation.
- Step 3: Mount the main unit into the primary frame/box position, then secure it using the appropriate screws or fasteners. Make sure the unit sits level and that all ports and connectors are accessible for wiring and future maintenance. If a camera is later added, verify alignment with any mounting accessories that may be included or recommended by the system designer.
- Step 4: Run, route, and connect wiring for power, data communication, and any optional accessories, following the manufacturer’s wiring diagram. Keep cables neat and protected, and ensure the installation does not interfere with the second frame position. Label wires for easy identification during future service or upgrades.
- Step 5: If you plan to add an additional module, install it into the second frame/box position now or leave space for future installation. Verify mechanical alignment and connect the module to the main unit as required by the system. Confirm that expansion components are compatible and correctly interfaced with the main unit’s ports and signaling.
- Step 6: Power up the installation, configure basic settings, and test door control, intercom signaling, and module communication to confirm correct operation before finalizing the installation. Perform a functional check of access permissions, relay operations, and any integration with other system components to ensure reliable performance from day one.
Frequently asked questions
- Q: What is the 2N Main Unit Without Camera?
- A: It is the central main unit used in every installation, designed to operate with or without a camera and to support modular expansion via a second frame position.
- Q: Is a camera included with this main unit?
- A: No — this variant is specifically described as a main unit without a built-in camera, though cameras or camera-enabled modules can be added through compatible configurations.
- Q: How many frame positions are required or recommended for installation?
- A: The design requires two frame/box positions: one for the main unit and a second reserved for additional modules, allowing future upgrades without changing the core installation.
- Q: What color options are available?
- A: The product is available in black as an alternative to standard finishes, offering a sleek appearance that blends with most environments.
- Q: Can I expand my system later?
- A: Yes. The second frame position is intentionally left for future module installation, so you can add readers, relays, or other 2N components as your needs evolve.
Customer reviews
Showing - Of Reviews


