Description
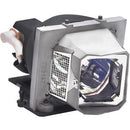
Upgrade your Dell projector experience with the Battery Technology Replacement Projector Lamp—the premium, OEM-grade lamp engineered to restore brightness, clarity, and reliability to your Dell M209x, M210x, M409mx, M409wx, M409x, M410hd, and M410x projectors. Crafted to meet exacting OEM standards, this replacement lamp delivers dependable performance, consistent color accuracy, and a seamless, tool-free installation that minimizes downtime and keeps your presentations—and entertainment—undefined by dim or uneven illumination.
- OEM-grade replacement lamp tailored for Dell M209x, M210x, M409mx, M409wx, M409x, M410hd, and M410x projectors
- Restores brightness, sharpness, and color fidelity for vibrant, high-contrast images
- Simple, plug-and-play installation designed for quick swap-outs with minimal projector downtime
- Rigorous quality testing to ensure reliability, stable performance, and consistent results over time
- Comprehensive support and compatibility guarantee to protect your projector investment
Technical Details of Battery Technology Replacement Projector Lamp
- Compatibility: Dell M209x, M210x, M409mx, M409wx, M409x, M410hd, M410x
- Lamp Type: OEM-grade replacement lamp module engineered to meet original Dell specifications
- Performance: Helps restore brightness, clarity, and color accuracy to match the projector’s intended output
- Installation: Designed for straightforward replacement with standard connectors and mounting
- Quality Assurance: Undergoes testing to ensure reliable operation and stable performance within spec
How to Install Battery Technology Replacement Projector Lamp
- Power off the projector and unplug from the mains; allow the unit to cool completely before handling
- Open the lamp cover following the Dell projector’s service manual instructions to access the lamp compartment
- Remove the securing screw(s) and disconnect the electrical connector from the old lamp
- Carefully remove the old lamp module and align the replacement battery technology lamp with the connector
- Insert and secure the new lamp, reattach the electrical connector, replace the lamp cover, and tighten the cover screws
- Plug in the projector, power it on, and reset the lamp timer according to the projector’s on-screen menu to maintain accurate usage tracking
Frequently asked questions
- Q: Which Dell projectors is this lamp compatible with? A: It is designed to fit Dell M209x, M210x, M409mx, M409wx, M409x, M410hd, and M410x models.
- Q: Will this lamp restore the original brightness and color accuracy? A: Yes. The OEM-grade design is intended to restore the projector’s brightness, clarity, and color fidelity to levels comparable with the original equipment.
- Q: Is installation difficult? A: No. Installation is intended to be straightforward and quick, typically requiring only basic tools and careful following of the projector’s service instructions.
- Q: Does it come with a warranty? A: The lamp is supported by standard warranty terms from the manufacturer, providing coverage for defects in materials and workmanship; check the product page for the exact warranty period.
- Q: How long does the lamp last? A: Lamp life varies with usage patterns, ambient conditions, and projector settings; refer to the projector manual for expected life ranges and best-practice usage to maximize longevity.
- Q: Do I need to reset the lamp timer after installation? A: Yes. After installing a new lamp, reset the lamp timer through the projector’s on-screen menu to ensure accurate maintenance reminders and performance monitoring.
Customer reviews
Showing - Of Reviews


