Description
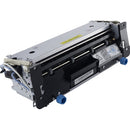
Dell 110v Fuser for Letter Size Printing – B5460dn / B5465dnf Laser Printers
The Dell 110v Fuser for Letter Size Printing is a critical component engineered to sustain the highest standards of laser printing quality on Dell B5460dn and B5465dnf printers. Designed to deliver consistent, durable fusion of toner to paper, this fuser unit helps ensure that every page—from routine reports to professional invoices—emerges with crisp text, sharp graphics, and long-term durability. By maintaining a stable heat and pressure profile, the 110v fuser minimizes misfeeds, smudges, and image inconsistencies, enabling your office to produce clear documents with confidence. Built to meet the exacting requirements of enterprise workloads, this replacement part supports reliable performance, reduces downtime, and preserves the professional appearance of your communications across countless letter-size prints. When you choose a genuine Dell fuser, you obtain a component that aligns with OEM standards, ensuring compatibility, precise calibration, and predictable print behavior throughout the life of the printer.
- Unwavering Letter-Size Print Quality: With precisely calibrated heat and pressure, the Dell 110v Fuser ensures uniform fusion across standard 8.5" x 11" sheets, delivering bold blacks, clean text, and smooth gradients on every page.
- Trusted Compatibility for Dell B5460dn and B5465dnf: This fuser is purpose-built for Dell’s B5460dn and B5465dnf laser printers, guaranteeing a snug fit, correct electrical connections, and reliable interaction with the printer’s firmware for stable performance.
- Optimized 110V Fusing Technology: Engineered for 110-volt power systems, the fuser provides quick warm-up and steady operating temperatures that support high-volume workloads while helping to maintain consistent image quality from first page to the last.
- Durable, Heat-Resistant Construction: Built with high-quality materials and protective coatings that withstand repeated fusing cycles, minimizing wear and tear and contributing to longer service life between replacements.
- Easy Installation to Minimize Downtime: Designed for straightforward replacement by trained staff or competent technicians, the unit’s connectors and mounting points align smoothly with the printer chassis, helping you return to printing with minimal disruption.
Technical Details of Dell 110v Fuser for Letter Size Printing
- Product Type: Fuser assembly
- Voltage: 110V
- Paper Size Support: Letter (8.5" x 11")
- Printer Compatibility: Dell B5460dn, Dell B5465dnf
- Print Technology: Laser
- Materials: High-temperature resistant polymers and heat-sealing components designed for repeated fusing cycles
- Usage Notes: Designed to pair with Dell toner systems and standard office stocks to deliver consistent fusing results
How to Install Dell 110v Fuser
- Power Down and Cool Down: Turn off the printer, unplug the power cord, and allow the printer to cool before you begin to avoid burns from heated components.
- Access the Fuser Chamber: Open the printer's service door or rear access panel as described in the user manual or service guide for the B5460dn/B5465dnf models. Ensure you have a clean, static-free work surface.
- Remove the Old Fuser: Disconnect any electrical connectors attached to the existing fuser, then loosen and remove mounting screws or clips. Gently slide the old fuser out, taking care not to damage nearby components.
- Prepare the New Fuser: Unbox the replacement and inspect it for any packaging residues. Align it with the printer’s guides and connectors, ensuring the fuser sits fully seated and the electrical contacts are clean and undamaged.
- Install and Secure: Reconnect all electrical connectors, align the mounting points, and secure the fuser with the appropriate screws or fasteners. Close the service door, reset any required counters or service flags in the printer’s menu, and reinsert the toner cartridge if it was removed during replacement.
- Power On and Calibrate: Plug in the printer, power it on, and perform any recommended calibration or alignment routines. Print a test page to verify proper fusing, ensuring the toner adheres evenly and there’s no smearing or ghosting.
- Final Checks: Confirm there are no error messages, ensure the printer recognizes the new fuser, and run a short print job that includes both text and graphics to confirm consistent quality across different content types.
Frequently asked questions
-
Q: Is the Dell 110v Fuser compatible with Dell B5460dn and B5465dnf?
A: Yes. This 110V fuser is designed specifically for these Dell laser printers and is intended to deliver OEM-grade performance, ensuring correct fit, electrical connections, and consistent print quality. -
Q: What signs indicate a fuser replacement is needed?
A: Common indicators include increased smearing or ghosting, uneven fusion, wrinkling or curling of pages, and overall softness or poor adhesion on letter-sized documents. If you notice these issues, replacement is often the next step for restoring print fidelity. -
Q: Can I install the fuser myself?
A: Yes, with basic mechanical aptitude and attention to safety. Follow the printer’s service manual for model-specific steps, unplug the unit during handling, and take care with hot surfaces. If you are unsure, seek assistance from a qualified technician. -
Q: Does installing a new fuser affect warranty?
A: In many regions, using genuine Dell parts for service maintains standard warranty coverage. Always verify with Dell support or your reseller to confirm regional warranty terms and eligibility. -
Q: How do I reset the fuser-related counters after installation?
A: After replacing the fuser, use the printer’s service or maintenance menu to reset the fuser counter or run a calibration routine as described in the user or service guide. This helps ensure accurate diagnostics and optimal performance going forward.
Customer reviews
Showing - Of Reviews


