Description
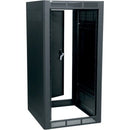
Middle Atlantic WRK-SA Rack Cabinet
Discover the Middle Atlantic WRK-SA Rack Cabinet, a premium solution engineered to handle thicker cable bundles and enhance cooling airflow in professional AV, IT, and data-center environments. With a wider footprint than conventional racks, the WRK-SA provides generous space for complex installations, smoother cable management, and improved accessibility. The stand-alone installation version features fixed solid sides and seismic certification, while the fully welded construction delivers exceptional rigidity and long-term durability for demanding workloads. Built to support reliable, scalable equipment layouts, the WRK-SA is an ideal choice for installations that demand both robustness and efficient environmental performance.
- Wide footprint designed to accommodate thicker cable bundles and maximize airflow, helping equipment stay cooler and more reliable under load.
- Stand-alone installation version features fixed solid sides and seismic certification, delivering stable support in dynamic environments such as mobile studios, broadcast spaces, or multi-rite installations.
- Fully welded construction provides superior rigidity and structural integrity, ensuring long-term durability even in high-traffic rack environments.
- Optimized front-to-back cable management with ample clearance and robust mounting options, enabling neat, scalable layouts for servers, switches, and patch panels.
- Designed to enhance cooling efficiency and equipment accessibility, reducing heat buildup and making maintenance or upgrades easier over the life of the installation.
Technical Details of Middle Atlantic WRK-SA Rack Cabinet
- Construction: Fully welded steel frame for maximum rigidity and durability.
- Special features: Stand-alone installation version with fixed solid sides and seismic certification.
- Footprint: Wide footprint to support thicker cable bundles and increased airflow.
- Cooling considerations: Design prioritizes improved airflow to maintain optimal operating temperatures for densely packed equipment.
- Intended use: Ideal for mounting equipment with thick cable runs and for applications requiring stable, sealed side configurations in stand-alone installations.
- Compatibility: Compatible with standard 19-inch rack-mount equipment and compatible accessories within the Middle Atlantic ecosystem.
How to Install Middle Atlantic WRK-SA Rack Cabinet
Installing the WRK-SA Rack Cabinet involves careful site preparation and methodical assembly to maximize performance and longevity. Begin by selecting a level, solid surface with adequate clearance for front and rear access and sufficient ventilation. Confirm the installation space meets the weight and footprint requirements of the cabinet and that the environment supports stable, seismic-certified configurations for the stand-alone version if applicable. Before unboxing, review your equipment list to determine the order of installation, prioritizing heavier gear first to establish a solid base and reduce handling strain during assembly.
Unpack the WRK-SA components and inspect hardware for completeness. Start with the base or floor mounting members, ensuring they are securely anchored to the floor or rack-dedicated mounting surface according to the manufacturer’s guidelines. Attach the vertical rails and any intermediate supports, verifying that mounting holes align with industry-standard 19-inch equipment cages. When placing equipment inside the cabinet, distribute weight evenly to maintain balance and avoid overstressing rails. Heavier servers and power distribution units should be seated first, followed by switches, patch panels, and smaller peripherals. This approach helps preserve proper airflow channels and simplifies cable management as you proceed.
Cable management is a critical element of successful WRK-SA deployments. Plan cable routing to minimize tangling and maximize airflow to heat-sensitive devices. Use cable ties, lacing panels, and strategic tie-off points to create clean back-of-rack pathways. For thicker cable bundles, route cables along the sides or top panels where floor-to-ceiling space permits, ensuring that front-to-back airflow is not obstructed. Leave sufficient space behind equipment for rear access during maintenance and for power distribution, while also accommodating future expansion. If the cabinet includes fixed solid sides in the stand-alone configuration, take advantage of this design by organizing interior space to reduce the need for door-access interruptions and minimize disturbance to adjacent gear.
Finish the installation by checking alignment, securing all devices with the appropriate hardware, and performing a final airflow assessment. Verify that all equipment is grounded correctly and that cable routes do not create accidental strain on connectors or ports. If seismic certification applies to your installation, confirm that the cabinet is secured according to local codes and the provided seismic guidelines to ensure stability during movement or vibration. Finally, power up the system and monitor temperatures to confirm the enhanced airflow design delivers on its cooling objectives. Regular post-install checks will help you sustain performance and extend the life of your equipment in the WRK-SA rack environment.
Frequently Asked Questions
- What is the primary benefit of the WRK-SA’s wide footprint? The wider footprint accommodates thicker cable bundles and provides additional space for improved airflow, which helps keep installed equipment cooler and reduces heat-related issues in dense rack configurations.
- Does the WRK-SA come with seismic certification? Yes, the stand-alone installation version of the WRK-SA includes seismic certification to support stable operation in dynamic environments where movement or vibrations are a concern.
- What kind of construction does the WRK-SA use? The WRK-SA is built with a fully welded steel frame, delivering strong rigidity and long-term durability suitable for professional AV and IT deployments.
- Can I install this cabinet for standard 19-inch gear? Yes. The WRK-SA is designed to hold standard 19-inch equipment, with mounting rails and space arranged to support common servers, switches, and patch panels while maintaining good airflow.
- How do I optimize cooling in a WRK-SA installation? Leverage the wide footprint to maintain front-to-back airflow, organize thicker cable bundles away from airflow paths, and ensure rear clearance for heat dissipation. Regularly inspect ventilation paths and avoid overcrowding the cabinet interior.
Customer reviews
Showing - Of Reviews


