Description
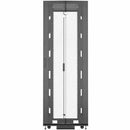
VERTIV VR Rack VR3157 Rack Cabinet
The Vertiv VR3157 rack cabinet is engineered to standardize deployments worldwide and accelerate time-to-online across data centers, edge locations, and enterprise networks. Built to accommodate a broad range of equipment—from servers and storage to switches, routers, PDUs, UPS systems, console port servers, and KVM switches—the VR3157 delivers a secure, scalable, and easily serviceable foundation for modern IT infrastructure. With high-density readiness, intelligent airflow design, and flexible mounting options, this cabinet helps IT teams deploy, manage, and expand critical workloads with confidence, reducing downtime and optimizing total cost of ownership. Vertiv’s engineering emphasizes modularity, serviceability, and resilience, so your infrastructure can grow with changing workloads while keeping maintenance overhead low. The VR3157 is designed to be installed in data centers, edge facilities, and multi-tenant environments where consistent performance and reliable access to equipment are paramount.
- Global standardization and rapid deployment — The VR3157 provides a uniform rack platform that simplifies provisioning across sites and regions, enabling consistent configurations, streamlined maintenance, and faster rollout of new workloads without rework.
- Broad compatibility for IT and networking gear — It supports a wide array of equipment including servers, storage arrays, switches, routers, PDUs, UPSs, console port servers, and KVM switches, with adjustable rails and tool-less mounting options to minimize downtime.
- Optimized for high-density environments — Perforated doors, integrated air-flow channels, rear cabling options, and a modular design keep airflow efficient, help prevent hotspots, and enable higher rack density in data centers and edge deployments.
- Security, reliability, and easy serviceability — A robust steel chassis, lockable front door, removable side panels, and modular components ensure equipment remains secure while providing quick access for maintenance and upgrades.
- Future-proof design with flexible configuration — The VR3157 supports modular rails, accessory kits, and compatible PDUs/UPS integrations, allowing your cabinet to evolve with changing workloads and expanding infrastructure requirements.
Technical Details of VERTIV VR Rack VR3157 Rack Cabinet
Technical specifications are listed in the official product specifications section on the vendor site. Because this description is based on the VR3157 product line, the cabinet is designed to accommodate a wide range of equipment and densities while preserving cooling efficiency, security, and serviceability across deployments. Specific measurements, materials, weight ratings, and mounting standards should be confirmed on the official specifications page for the exact SKU or UPC you are using.
- Height: Refer to official specifications for the exact height in U.
- Width: Refer to official specifications for the exact width in inches.
- Depth: Refer to official specifications for the exact depth in inches.
- Material and finish: Heavy-gauge steel with powder-coated finish for durability and corrosion resistance.
- Weight capacity: Maximum rack load and equipment weight are defined in official specs for the chosen SKU.
- Ventilation: Front and rear perforated panels support optimized airflow and cooling efficiency.
- Security features: Lockable doors and optional rear access with secure hardware.
How to Install VERTIV VR Rack VR3157 Rack Cabinet
Installing the VR3157 is designed to be straightforward and safe, with steps that support rapid deployment and long-term reliability. Before you begin, ensure the installation site meets space, power, and cooling requirements and that you have the appropriate hardware and accessories on hand. Follow these steps to install and configure your cabinet for immediate operation:
Step 1: Prepare the installation site by confirming floor clearance, vibration limits, electrical supply, and cooling capacity. Verify that the rack location aligns with raised floor tiles or slab mounting and that there is adequate clearance for door swing and cable management.
Step 2: Unbox, inspect, and inventory all components. Check the cabinet frame, doors, panels, rails, and mounting hardware for shipping damage and ensure everything is present on the packing list before assembly.
Step 3: Assemble the rack rails and mounting hardware. Use adjustable rails to accommodate your equipment depth and width; attach front and rear rails securely to the cabinet chassis, ensuring square alignment for stable mounting.
Step 4: Install cable management and power components. Attach cable management arms or organizers to route data and power cables cleanly; pre-route PDU and UPS cables to minimize tangling and to support airflow.
Step 5: Mount equipment using standard 19-inch rack rails. Start with the heaviest items at the bottom to maintain stability and evenly distribute weight; leave sufficient space for airflow and access to ports and cooling openings.
Step 6: Attach doors, panels, and seals. Install the perforated front and rear doors, secure side panels, and configure any locking mechanisms. Verify door clearance and ensure unobstructed ventilation paths from front to back.
Step 7: Validate functionality and airflow. Power up systems in a controlled sequence, configure device consoles or KVM as needed, and monitor temperature and humidity to confirm proper cooling and operation.
Frequently asked questions
- Is the VR3157 suitable for high-density deployments? Yes — designed to support dense server and storage configurations with optimized airflow, modular rails, and compatible accessories.
- Does the cabinet include lockable doors? Yes — the front door is lockable, with options for rear access and security hardware to protect equipment.
- Can I customize cable management? Yes — the cabinet accommodates cable management arms, ganging panels, and multiple knockouts for clean, scalable cable routing.
- What equipment types can fit in this cabinet? It supports servers, storage, switches, routers, PDUs, UPS, console port servers, and KVM switches with adjustable rails and mounting hardware.
- How do I install it? Follow the installation steps described above, ensuring compliance with safety and electrical guidelines and referencing the official specifications for exact dimensions and load ratings.
Customer reviews
Showing - Of Reviews


